Sourdough Recipe Log
If you’ve tried baking sourdough bread, you know that it is a game of trial and error. It’s important to keep track of what you did during each bake attempt to understand what worked and what didn’t. It’s also fun to look back on past loaves and admire your progress as a baker. This downloadable log will help you keep track of your recipes, your dough making process and the final results as they come out of the oven.
Download the Google Sheets version HERE
How It Works
The first sheet of the log is the recipe template. This can be duplicated every time you bake as a consistent, easy-to-use tracker. The default recipe is my current favorite that I have been working with for the past few months.
Getting Started
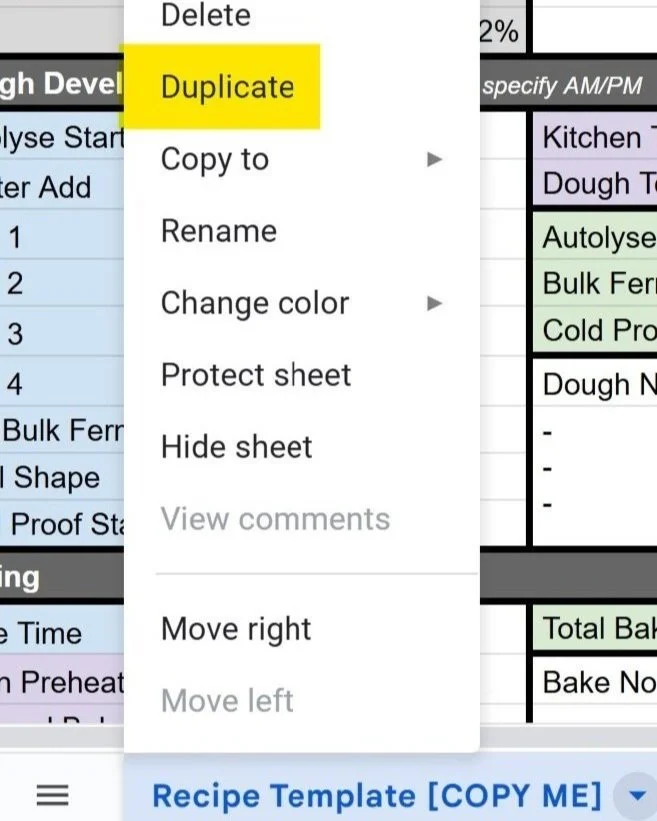
To copy the template for new bake, right click on the recipe template sheet name and select “Duplicate”.
The new sheet can then be renamed by double clicking the sheet name again. I like to use the loaf reference number or bake date as the new recipe sheet name.
New Sheet Title Block
Record the date, number of loaves that the recipe will make, and give the loaf, or loaves, a reference number to easily keep track for the future.
Dough Recipe
Input your flours, water, salt and starter weights, in grams, and the tool will automatically calculate baker’s percentages for the recipe. Use the dropdown to select the activity level of your starter when you added it to the dough. Any white cell can be edited if you want to change the flour type. This calculator is fun to play with when creating new recipes or experimenting with hydration percentages.
Dough Development
Use this section to keep track of the dough development by logging the time that you completed each step. The template is set up to accept 24h time (ex. 3pm is 15:00) or a time with “AM” or “PM” specified in the input. If doing a fermentolyse, use the same time for Starter Add and Autolyse Start. Kitchen temperature and dough temperature are important to record because they will help you look back and correlate bulk ferment times with ambient temperature. These can be entered in F or C.
Baking Log
Record the baking temperatures in F or C and baking times in minutes for the covered and uncovered portions of the bake. Bake time can be in 24h format or with AM/PM specified. The template assumes that you are baking the day following the dough mixing and development. Total Bake Time is automatically calculated in minutes.
Loaf Review
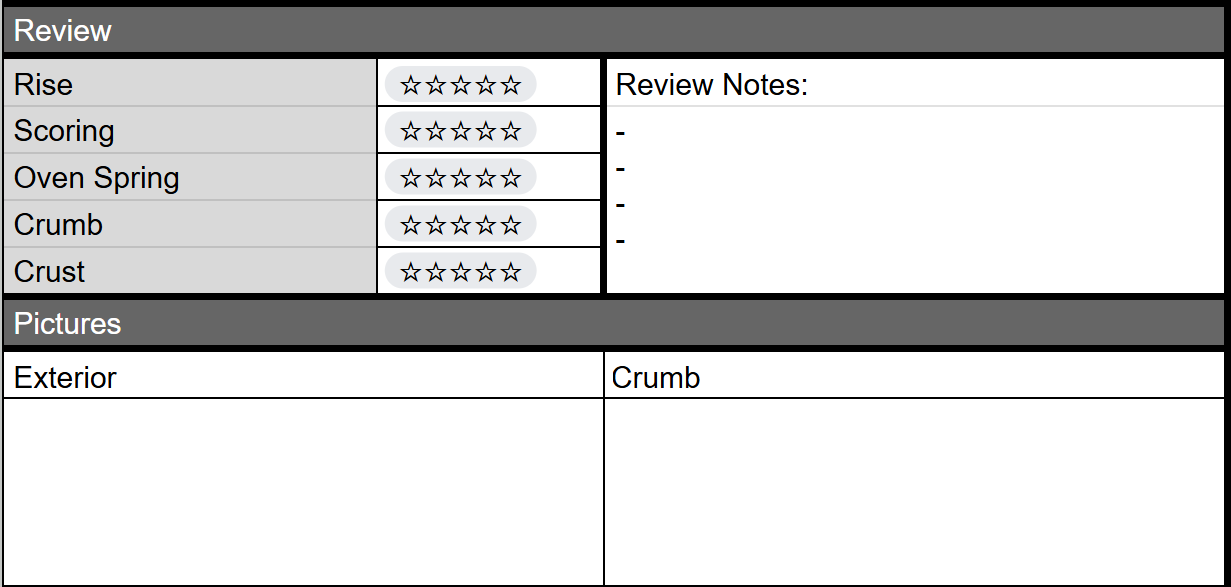
Now that you’ve baked the loaf, give it a rating and take some pictures! The ratings can be somewhat subjective, but try to keep it a consistent scale. These ratings can be transferred over to the bake log to track progress. When taking crumb pictures, be sure to wait at least 2 hours for the loaf to cool before cutting into it.
Keep Track of Progress
Use the Bake Log to keep track of your progression in a single, consolidated table. Make notes and record your reviews to easily reference your best and worst loaves in the future to learn from your successes and mistakes.
Learn to love the journey over the result. Even for me, not every loaf is a winner. With baking, failure is cheap and delicious - even the ugliest loaf will taste great when sliced and smothered in butter. Keep trying, find the joy in the process, and don’t forget to share your successes.


